Mosaics I: Mosaic as a Decorative Technique
Course Section # 3502fa1 Fall 2008
Mondays 6:30PM – 9:30PM (Sept 15 to Nov 24, 2008)
Instructor Gordana Zivkovic www.ualberta.ca/~zivkovic
e-mail: gzivkovi@ualberta.ca
Prerequisites: No prerequisites. This
is an 'Open Studies' course. Anyone with the interest to study can register,
irrespective of previous educational experience.
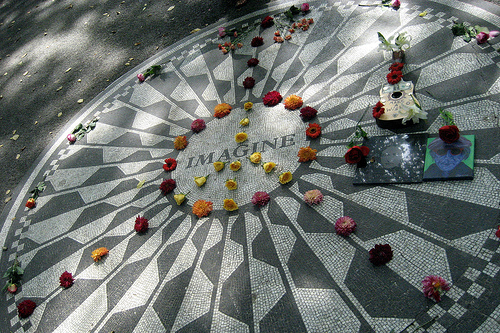
Description: From Niki de
Saint-Phalle's fantastic sculptures all the way back to the splendor of
Byzantine Basilicas, mosaic has been an art form particularly well suited to
monumental and public art, both sacral and secular. This class will start with
direct methods on flat surfaces and progress to the basics of the inverse method
with marble and smalti with the aim of introducing basic techniques through a
series of small-scale projects. Primary activity will be actual studio work
complemented by short lectures and slide presentations.
Assessment: Certificate students are either given credit
(CR) or incomplete (IN)
Non-certificate
students are either audit (AU) or incomplete (IN). Assessment will be made on
the basis of attendance and course projects completed.
Suggested readings:
Angelo Cangemi. 2001. Making Mosaics: Materials-Tools-Techniques. Mosaico Arte ed Artigianato, Antonina Parisi
Publisher (available through www.dimosaico.com or directly from Italy)
Joseph L. Young. 1963. Mosaics: Principles and Practice. Reinhold.
Isotta Fiorentini Roncussi and Elisabetta Fiorentini. 2002. Mosaic:
Materials, Techniques and History. MWeV Editions. (available through www.dimosaico.com or directly from
Italy)
Roger Ling. 1998. Ancient Mosaics. Princeton University Press.
Sonia King. 2002. Mosaic: Techniques & Traditions. Sterling Publishing.
You can buy some of the books, but I
recommend that you wait until the first class and see all the books that I will
bring in, so you will have a better idea what you will need. My books will stay
in the class throughout the course.
Course materials:
Smalties, stones,
glass, vitreous glass, ceramic tiles, pebbles, china scrap, shells, marble
scrap, mesh backing sheet, wooden board, Welbond glue, wallpaper glue, silk
paper, scissors, knife cutter, Kerabond (MAPEI), Keralastic (MAPEI), grout, plastic
sheets, palette knives, rubber gloves, protective glasses, yoghurt cups,
pencil, marker, cheap brush, tarlatan, old rags, sponge, masking tape, tile
cutters, glass cutters, hammer for cutting stone, hardie, log, Portland cement,
sand, armature, wire for hangers, scrap wooden boards for framing mosaics for
casting, regular hammer, bucket for mixing cement, tool for mixing cement,
measuring tool for cement and sand.
*Always
wear glasses for your protection and gloves when you are using cement, mortar and
grout
SCHEDULE
Week I -
DIRECT METHOD
Introduction
Familiarization with
tools, materials, and techniques
Starting on the 1st
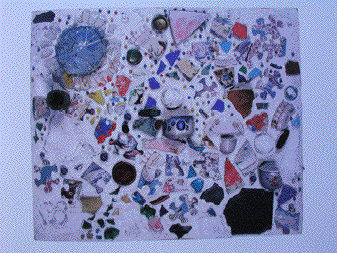
project - max letter size, direct method on the board with varied materials
(marble, glass, broken china, metal pieces, etc.)
Some materials will
be provided. Students can also bring their own material - scrap china, shells, stones, marble, glass,
whatever you would like to use for your first project. A lot of these things
you can find in Dollar stores.
Also bring, yoghurt cups. I will show you in class the materials that we
will use in the next classes and you can then buy more, depending on your
projects.
Inspiration for this
project could be found in the work of Niki de Saint-Phalle at following
sites:
http://www.gallerydelaive.com/
http://www.nikidesaintphalle.com/cardmenu.html
http://www.thejoyofshards.co.uk/tuscan/index.shtml
http://www.nikidesaintphalle.de/
http://karaart.com/saint.phalle/
www.artcyclopedia.com/artists/saint-phalle_niki_de.html
http://karaart.com/saint.phalle/
Niki de Saint Phalle
.
Weeks II &
III - DIRECT METHOD
We will start the
2nd project, in direct method, using Welbond glue with glass or
ceramics. You can buy mirrors at IKEA or wooden boxes, terracotta pots for
flowers (for inside) etc. I will show you the grouting method at the end of
your project.
Glass tiles, ceramic
tiles and some of interesting materials for your mosaic project you can order
from Erin at www.oddlyenoughmosaics.com or you can go to her
place in person (I recommend the latter). Her address is 10450-144 St (side
door). Her home phone number is (780) 463-5113.
We will use: board,
glass or ceramic tiles, Weldbond glue and grout. Important: glass or ceramic
for this kind of mosaic has to be of same thickness. This makes the grouting
process possible.
Before class look
at: http://www.mosaicartsource.com/mosaicart/mosaic_art_resource/mosaic_glossary.html#o (look under opus)
Bring: Weldbond
glue, board or surface that you would like to work on, ceramic tiles or glass
tiles, broken ceramic or material that you want to use for your mosaic piece,
palette knife, yoghurt cups, grout (you can buy it at Erin’s place), pencil,
sponge, and if you already have an idea for your project bring the drawing that
you will develop into a mosaic piece.
Note: Order your
material for the last project (we’ll start it in Week VII) well in advance. If
you are ordering stones from www.diMosaico.com it will take time to arrive. If
you know some stone cutters here where you can buy or get some scrap marble for
free you are welcome to do it. (Black marble is very hard to break so take some
small pieces). At www.dimosaico.com you have measures for how many stones you will need for a particular
surface size. Count that you will have around 20% loss on it.
INSPIRATION:
http://www.mayang.com/textures/Stone/html/Paving%20Stones/index.html
http://www.mayang.com/textures/Stone/html/Stone%20Walls/index.html
http://www.centroaletti.com/alettiref.htm
http://www.mosaicartsource.com/mosaicart/mosaic_art_resource/mosaic_glossary.html#o
look under opus)
http://mosaicartsource.wordpress.com/2007/01/10/smalti-mosaic-gold-edmonton-alberta-canada/
http://www.mosaicartsource.com/mosaic_supply_canada/mosaic_supply_shop/shoppinginfo/about_mas.html
http://www.orsoni.com/default.asp?pc=006000000000002
http://www.mosaictilesupplies.com/installation.html
http://www.scuolamosaicistifriuli.it/en/gallery/default.asp?c=4&d=10&dt=ARAN
http://www.mosaicartsource.com/mosaicart/mosaic_art_gallery/mosaic_gallery.html
http://mosaik.wordpress.com/tag/mosaics-around-the-world/central-southern-and-east-asia/japan/
http://www.littleironies.co.uk/publicart.htm
http://mosaik.wordpress.com/tag/public-art/
Weeks IV
& V - DIRECT METHOD on the plastic mesh
Grouting the 2nd
project and starting on the new, 3rd project - direct method on a plastic mesh
(pebbles, ceramics, glass, tesserae). Find some geometric drawing, ornament or
arabesque (maze is very interesting as geometric form). Make a copy the size of
your project. If you want to install it in the class you can use boards, step
stones etc.
We will use: plastic
mesh, plastic sheet under plastic mesh, liquid nail glue or some kind of glue
can be used for outside projects (look in Rona or Home Depot and ask for the
kind of glue for outside projects based on the material that you are using;
some kinds of glue don’t apply both to ceramic and glass), and depending on
material you use for this kind of mosaic it can be: without any kind of grout,
or with grout. If you want to make a project that is for inside then you need
just Welbond glue and sand grout at the end. If you want to make grout in some
special color that we haven’t in the class you can buy it in the small packs at
Erin’s place.
Plastic mesh you can
buy at Erin’s place too.
Important: glass or ceramic for this kind of mosaic has to
be of same thickness. This makes grouting process possible.
*almost all
direct methods are on the surface irregular – they don’t give you flat surface – you can avoid that with
negative/inverse method on tarlatan and direct casting.
Usually we use plastic
mesh with this method to cast directly on the place where you want to have
it, but we can cast it also in the class. You will be able then to install
it like a mosaic piece wherever you want.
Method for casting
this kind of mosaic directly outside on the floor or on the wall is by
using kerabond and keralastic (mixture) as a base and pressing mosaic directly with a special plastic tool. You
can grout your mosaic with sanded grout - this kind of grout has to be for
outside use because of low temperatures.
Tesserae will be
very hard to grout, because of cleaning, but it is not impossible. If you grout
it, use sawdust and cloth to remove the rest of the grout.
direct method on plastic
mesh - tesserae
inverse/indirect method on tarlatan cloth
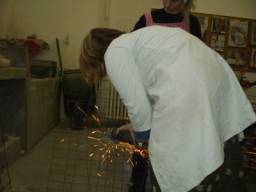
Week VI
Installation
and grouting of the 3rd project and starting on a new, inverse method. You
have to bring scrap stones or ready broken stones (if you bought it from www.dimosaico.com).
I will show you how to break stones and make tesserae. If you want to explore
direct method for outside project with stones and smalties mounted on a Hexlite
boards you are welcome to do it (you can also use DensShield Tile Guard backer
boards obtainable from Rona). You have to make a sketch of a project that
you want to do, count how much material you will need and order it all from
www.diMosaico.com. This kind of mosaic will be very light (compared to mosaic
in inverse technique that we will cover in next classes) and suitable for
mounting outside on the wall (even on a wooden wall).
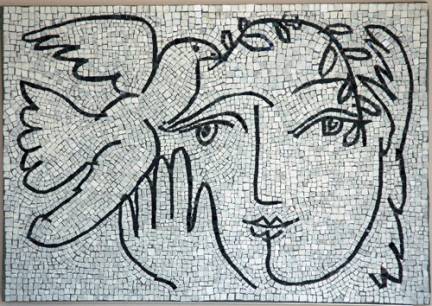
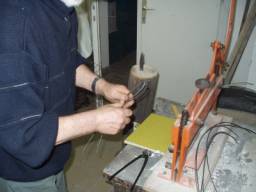
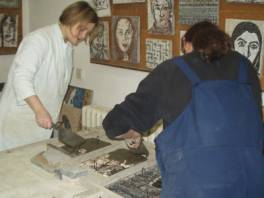
Weeks VII, VIII & IX
Draw your portrait.
Linear drawing on a letter paper size - use brush and ink (if you don't know
how to draw, you can apply Photoshop effects such as “Artistic” or “Brush stroke” filters to a photo of
your face). We will do black and white portrait with stones (tesserae)
You will need: a
piece of tarlatan or silk paper, pencil, nippers, hardie & log, hammer,
stones, wallpaper glue, a cheap brush, and plastic containers.
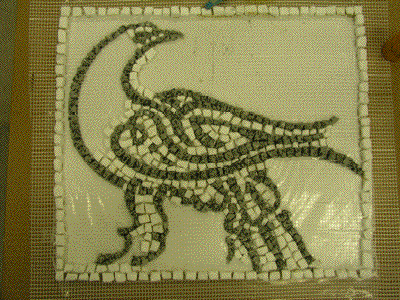
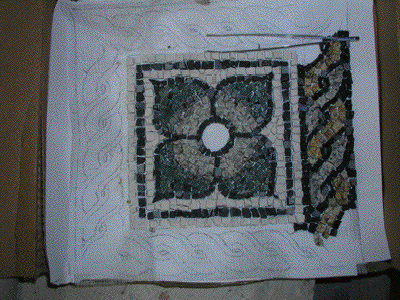
If you want to do
something else than portrait, or if you are more experienced, you can look at
Roman mosaics to find some simple floral or animal design as a motif. Try to
use an uncomplicated motif in just a few colors, this will help you to finish
your mosaic piece in time to be cast.
Starting project.
*For indirect method
on paper and tarlatan we will use wallpaper glue. This kind of glue is a powder
that you have to mix with water. After casting mosaic it will be possible to easily remove it just with water.
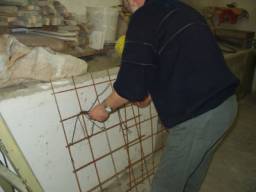
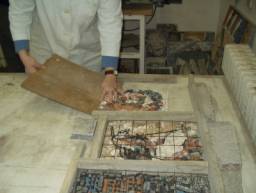
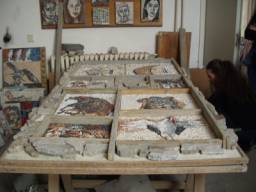
Week X - casting
inverse method mosaic
Overview and
conclusion. Consider that you have to come the day after and wash the mosaics.
If it is cold in the room it might take longer time to dry.
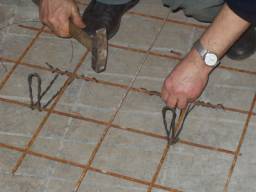
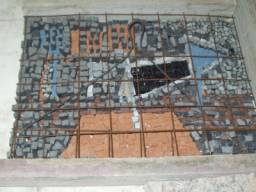
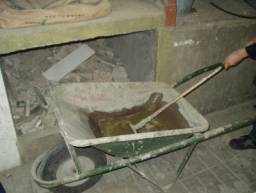
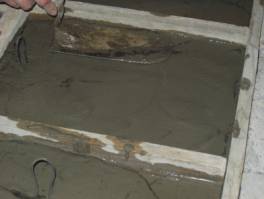
INVERSE CASTING
1. making and
setting wood frame and armature
2. wire for hanging
3. two layers of
mortar made by mixing Portland
cement and sand
a) first layer – to cover
tesserae 1:1 (Portland cement 1, and sand/children playing sand)
b) second layer – to cover
armature 1:2 (Portland cement, sand)
4. tap on the bottom
of the table
5. during the day –
watering the cast mosaic
6. 20-24h after
casting mosaic, turning it over, washing it with wire and plastic brush
7. washing it with
dish soap
8. drying
9. after few days (7
or 10) you can install it as a permanent piece wherever you wish - on the floor
or on the wall.You can also apply protection for marble – some kind of acrylic
liquid or some special wax protection (see at Rona) - you can choose glossy or
mat finish.
Proces:


Supplies in Edmonton you can find at Erin's place. You can buy them
online at
or contact Erin directly and go to her store (what I recommend). Her home phone number is (780) 463-5113,
and her address is 10450-144 St (side door)
Other recommended suppliers: www.dimosaico.com
Some material you can find in RONA or Home Depot & Dollar store
MOSAIC ARTIST ASSOCIATIONS
http://www.mosaicartcanada.org/home.html
http://www.americanmosaics.org/
Policy about course outlines can be found in Section
23.4(2) of the University Calendar (GFC 29 SEP 2003).
The University of
Alberta is committed to the highest standards of academic integrity and
honesty.
Students are expected to be familiar with these
standards regarding academic honesty and to uphold the policies of the
University in this respect. Students are particularly urged to familiarize
themselves with the provisions of the Code of Student Behaviour (online at
www.ualberta.ca/secretariat/appeals.htm) and avoid any behaviour which could
potentially result in suspicions of cheating, plagiarism, misrepresentation of
facts and/or participation in an offence. Academic dishonesty is a serious
offence and can result in suspension or expulsion from the University."
(GFC 29 SEP 2003)