Surface Mount Soldering Help
By Daniel Hill - Group 4
After having some practice dealing with "spider webbing" surface mount
LEDs, I thought
that I would share some of what I have learned.
Requirements for soldering surface
mount components:
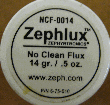
Flux - This is handy as it helps to hold things together as well as
allowing the solder to flow easily

pic1. A bottle of flux I borrowed off of Rick
Note: any remaining flux can be damaging to components. So it is wise
to use sparingly and to wipe off excess after.
Wire Stripper - Need to strip the wires obviously
Wire Cutters - Likewise
Wire - Pretty much required
Solder - Smaller the better, you can more easily control the amount
that gets on the soldering iron
Soldering Iron - I was using the baby blue soldering iron in the lab,
with the No 7. "screwdriver" tip. It's the larger one (not as fine a
point) but it only gets up to 700F, the other No 8. tips are 800F tips
and would have damaged the LEDs.
Component to be "spider webbed" - I am using relatively large size
LEDs, much smaller components exist and would be a lot more challenging
to hand solder.

pic2. LED Component (dime for comparison)
Alligator Clip - These aren't required, but they are great for holding
wires and pulling them.
Steps for Soldering:
1) Warm up the iron
2) While that is happening, we can apply flux to the pads of the
component. I like to use a piece of wire casing as a sort of paint
brush.
Paint Brush

pic3. Wire casing with flux on it
Finished Applying Flux

pic4. LED with flux on it
3) We also apply a little bit of flux to the end of the wire we are
attaching. This mostly helps the wire to stick to the component while
we are applying the solder.

pic5. Wire with flux
4) Place the wire on the pad that you want to attach it to.

pic6. LED with wire held in place by flux
5) By now the iron should be plenty hot. We can add some solder to the
tip. It will want to form into a little ball.
Solder Ball

pic7. Solder tip with ball of solder on it
With this tip it curves, so I aim to have the outside with the solder
on it. This way, the first this that will hit the connection to be made
is the solder.
6) Quickly and lightly brush the molten solder onto the flux covered
joint. If this is done correctly most of the flux will evaporate, and
the solder will jump to fill the area.

pic8. LED with one connection made
7) We have one connection made, now we can repeat steps 3 - 6 for all
of the remaining connections to be made.

pic9. Finished LED
8) After, depending on how this is being used, it would be nice to have
some insulation around the connection. Using the alligator clip grip
the other end of the wire (must be exposed). Place the wire stripper in
between the alligator clip and the remaining insulation. Push the
remaining insulation down towards the new connection gripping the wire
with the alligator clip.
We will end up with something like this:

pic10. Finished and insulated LED
If you have any questions or suggestions I can be reached at
drhill AT ualberta DOT ca
Thanks,
Daniel Hill


